


FREE 5th Friday Pattern - Shine Bright Mug Rug
The “Shine Bright Mug Rug” crochet pattern is also available as a premium PDF download on Ravelry.
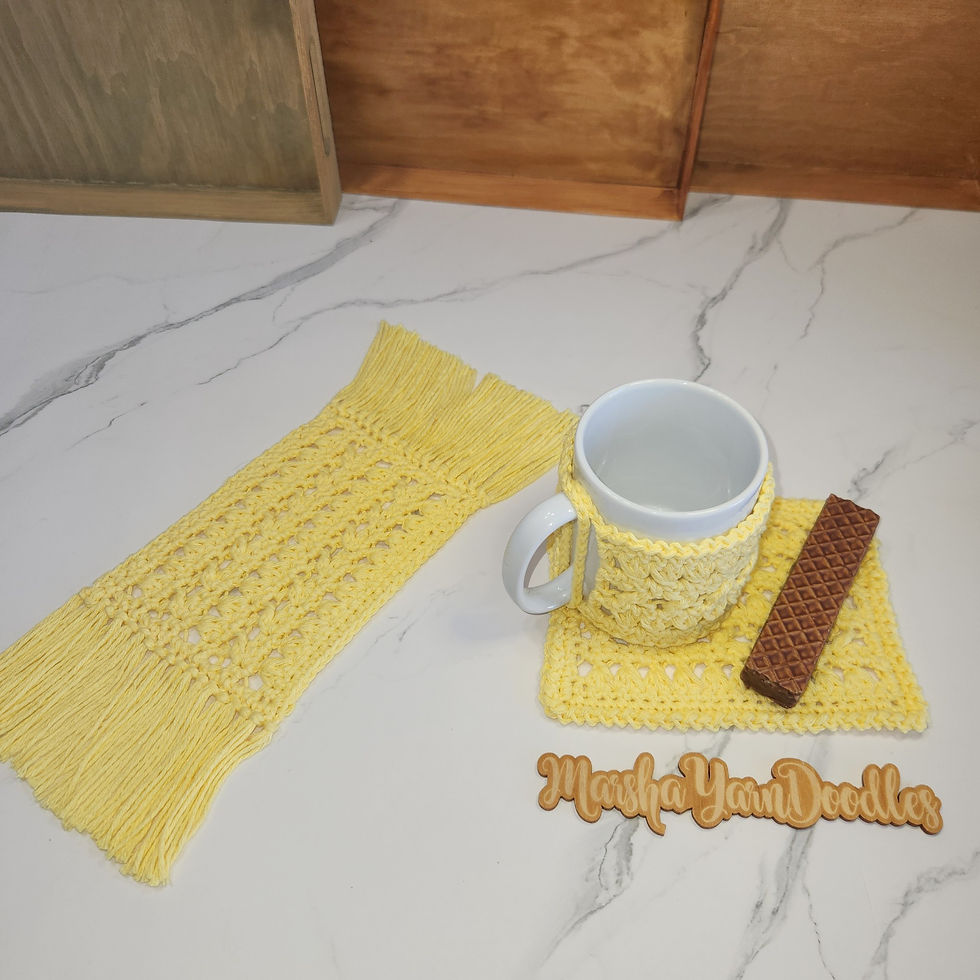
The “Shine Bright Mug Rug” is a quick and easy crochet pattern. Its beautiful texture looks wonderful in a variety of colors and styles. Large enough for your favorite mug and a little snack, this cozy mug rug adds a cheerful handmade touch to any table or workspace.

Perfect for gifting, the Shine Bright Mug Rug makes thoughtful presents for friends, teachers, coworkers, and coffee lovers. They also work up quickly, making them a great choice for craft fairs and market sellers.

This mug rug is has gorgeous texture and is perfect for using up yarn from your stash. This project works up fast and makes a thoughtful handmade gift. Its speedy construction makes it an excellent choice for teacher gifts, market prep, stocking stuffers, and last-minute makes.
A small project with big charm, this mug rug is sure to Shine Bright!

Materials
➤ Yarn: 100% Cotton (or other natural absorbent fiber)
➤ Yardage: 30 - 35 yds
➤ Hooks: 5.0 mm (Body) & 4.5 mm (Border)

Stitches & Abbreviations
US Terminology
➤ * * = Repeat stitch pattern between * *
➤ Ch# = Chain number of times specified
➤ St/Sts = Stitch/Stitches
➤ SS = Slip Stitch
➤ SK# = Skip number of sts specified
➤ SC = Single Crochet
➤ DC = Double Crochet ➤ TR = Treble Crochet ➤ Beginning TRIAD = YO, insert hook in 2nd st of row, YO and pull up loop to height of DC (3 loops on hook). YO, insert hook in NEXT stitch, YO and pull up loop to height of DC. Repeat again (7 loops on hook). YO, pull through 6 loops (2 loops on hook), YO, pull through 2 loops, Ch1. ➤ TRIAD = Yarn Over (YO). insert hook in SAME st as last TRIAD ended, YO and pull up loop to height of DC (3 loops on hook). YO, insert hook in NEXT stitch, YO and pull up loop to height of DC Repeat again (7 loops on hook). YO, pull through 6 loops (2 loops on hook), YO, pull through 2 loops, Ch1. Rich Textures Crochet Video Tutorial ➤ BACK X-TR = Back Crossed Treble – Sk 2 sts, TR in next st (or Ch1 sp), Ch1, crossing over in BACK of TR you just made, TR in 1st skipped st (or Ch1 sp), leave middle st un-worked. NOTE: You can use Ext-DC in place of TR, if preferred.

Notes & Special Instructions
➤ Chains at beginning of a round/row NEVER count as a stitch.
➤ I suggest using the invisible join for a seamless look when finishing off.
MUG RUG Pattern
NOTES: | TURN at end of EVERY row. EVEN rows = RIGHT/FRONT side facing you. Ch1 sps count as a st throughout. End of row st count will remain the same throughout. REMINDERS: TRIAD st ends with Ch1. Pattern is written using a chainless beginning DC. Use your preferred method for 1st DC. |
Row 1: | NOTE: Foundation row st counts are suggestions. You can change foundation row st count to any ODD multiple of 3 +2 DC sts. Chainless Foundation SC 23 sts OR Chain 24, 1 SC in 2nd back bump from hook, 1 SC in each back bump across. |
Row 2: | 1 DC in 1st st, Ch1, Beginning TRIAD. TRIAD across. 1 DC in last st. |
Row 3: | NOTE: Work into top of each st & Ch1 sp. Ch1, 1 SC in each st across. |
Row 4: | 1 DC in 1st st. Back X-TR (worked over next 3 sts) across. 1 DC in last st. |
Row 5: | NOTE: Work into each st & Ch1 sp. Ch1, 1 SC in each st across. |
Rows 6-9: | Repeat Rows 2-5. |
Rows 10-11: | Repeat Rows 2-3. Do NOT fasten off. Proceed to BORDER of your choice. |
BORDER: Option 1 (with fringe)
NOTE: | You may want to use a smaller hook size so piece does not get wavy. RIGHT side should be facing you for BOTH rows. |
Rnd 1: | TIP: When working on raw edges, place 1 SC at end of each SC row & 2 SC at end of each DC row. Working across top: 1 SC in each st across. Working down short side: Ch2 & rotate work. Evenly space SC down side. Working across bottom: Ch2 & rotate work. 1 SC in each st across. Working up other short side: Ch2 & rotate work. Evenly space SC up side. SS join to 1st SC of rnd. |
FRINGE: | Attach fringe (of desired length) evenly down both short sides. |
BORDER: Option 2 (with NO fringe)
NOTE: | Do NOT turn at end of Rnds. RIGHT side should be facing you for BOTH rnds. |
Rnd 1: | TIP: When working on raw edges, place 1 SC at end of each SC row & 2 SC at end of each DC row. Working across top: Ch1, 1 SC in each st across. Working down short side: Ch2 & rotate work. Evenly space SC down side. Working across bottom: Ch2 & rotate work. 1 SC in each st across. Working up other short side: Ch2 & rotate work. Evenly space SC up side. Ch2, SS join to 1st SC of rnd. |
Rnd 2: | NOTE: You may want to use a smaller hook size on this round so TRIM does not get wavy. **Ch1, SS in next st.* Repeat across to Corner. Ch1, SS in Ch2 Corner. Repeat again.** Repeat around. Use invisible join to 1st st. Fasten off. Weave in ends. |


Comments